Best Way to Record Acoustic Guitar
Pick a room over 12 feet wide to avoid boxy lows, and use a small-diaphragm condenser like a Rode NT5 6 to 12 inches from the 12th fret for balanced tone. Skip the soundhole to dodge 100Hz boom, and blend in your Taylor ES2’s DI with phase alignment to prevent mud. Apply a high-pass at 80Hz, cut 200–400Hz, and add a touch of 12–15kHz spark. Use a dark reverb like EMT 140 with 1.5s decay for space. You’ll hear how these choices shape a pro guitar tone.
We are supported by our audience. When you purchase through links on our site, we may earn an affiliate commission, at no extra cost for you. Learn more. Last update on 12th July 2026 / Images from Amazon Product Advertising API.
Notable Insights
- Choose a room larger than 12 feet wide with balanced acoustics to avoid boomy or dull tones.
- Use a small-diaphragm condenser mic placed 6–12 inches from the 12th fret for accurate, detailed sound.
- Avoid soundhole placement to reduce low-end boom and proximity effect.
- Record both DI and mic signals, then align them for phase coherence and richer tone.
- Apply high-pass filtering, cut 200–400Hz muddiness, and add subtle reverb for clarity and space.
Choose a Room That Enhances Your Guitar’s Tone
Your guitar’s voice deserves a space that lets it breathe, so skip that cramped eight-foot-wide bedroom-its tight dimensions exaggerate low-mid resonances, causing tone shifts you’ll notice even when nudging the mic a few inches. For acoustic guitars, room size matters: larger rooms, like living areas or studios over 12 feet wide, offer a smoother frequency response and more natural room sound. Small, carpeted bedrooms absorb highs and feel boxy, dulling your tone. Instead, aim for balanced environments-hard floors with area rugs, or rooms with some reflective surfaces. Churches or tiled bathrooms add brightness and reverb, but too much reflectivity limits mix flexibility. Position yourself near hard floors or use a whiteboard as a reflection panel to enrich the tone. The right room improves clarity, depth, and consistency, giving your recordings professional polish without extra processing.
Use a Condenser Mic for the Most Natural Recording
A condenser mic is the go-to choice for capturing acoustic guitar with clarity and authenticity, thanks to its wide frequency response from 20Hz to 20kHz and exceptional sensitivity to harmonic detail above 10kHz. You’ll want a condenser microphone because it accurately translates string attack, body resonance, and subtle overtones. Small-diaphragm condensers like the Rode NT5, Neumann KM184, and AKG C451 deliver bright, tight imaging and maintain accuracy even when slightly off-axis. If you’re tracking a Taylor Grand Pacific or similar rich-voiced guitar, large-diaphragm condensers add warmth and capture low-end depth with lower self-noise. Just remember, your condenser mic needs 48V phantom power to charge its internal backplate and activate the thin diaphragm. For premium detail, the DPA Core+ 4099, though pricey at $840, offers unmatched clarity and placement flexibility, making it a studio favorite for showcasing luthier-grade instruments with precision.
Mic the 12th Fret, Not the Soundhole, for Balanced Tone
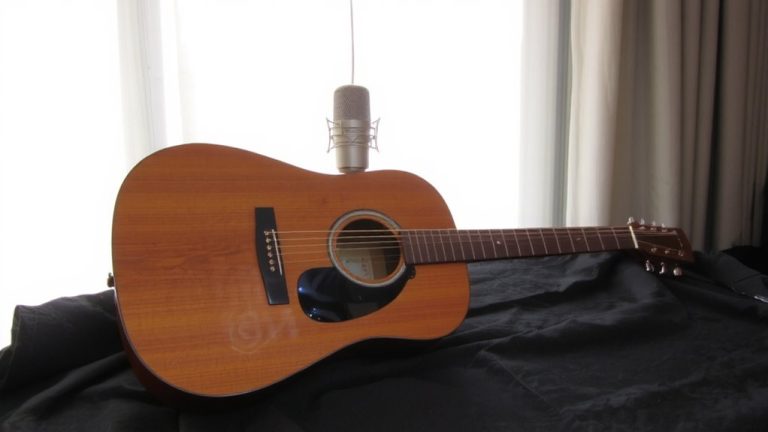
Skip the soundhole-go straight to the 12th fret. When you mic the 12th fret, you capture a balanced tone with clear string definition and even body resonance, avoiding the muddy low-end buildup common near the soundhole. Placing your mic 6 to 12 inches from the 12th to 14th fret, aimed at the neck-body junction, reduces proximity effect and minimizes the “puff of air” that muddies mixes. Small-diaphragm condensers like the Rode NT5 or Neumann KM184 excel here, offering detailed response up to 10kHz and accurate off-axis capture.
| Position | Frequency Issue |
|---|---|
| Soundhole | +3dB boom around 100Hz |
| 12th Fret | Flat response, no low-mid pileup |
You get a natural, mix-ready sound-no corrective EQ needed.
Record With DI and Mic for Maximum Flexibility
While you’re chasing that rich, studio-quality acoustic tone, recording both a DI signal and a mic track at once gives you way more control in the mix. Grab the DI directly from your guitar’s onboard pickup-like the Taylor ES2-for a clean, consistent signal you can re-amp or add convolution reverb to later using Space Designer or Pro Tools. At the same time, use a small-diaphragm condenser microphone like the DPA 4099 to capture the natural resonance and room character. Engineers on Acoustic Sessions regularly use this mic plus DI combo to keep fingerpicking definition while preserving warmth. Later, blend both signals, aligning them carefully with a plug-in like Voxengo PHA-979 or Phasebug to fix any timing lag-critical for phase alignment and avoiding thin, hollow spots caused by frequency cancellation.
Decide Between Mono and Stereo for Your Track
You’ve got your DI and mic signals captured cleanly, now it’s time to choose how your acoustic guitar sits in the stereo field-mono or stereo. If your mix is dense and the guitar plays a supporting role, go with a mono mic technique: place one mic 6–12 inches from the 12th–14th fret for a balanced, natural tone. It’s simple, phase-safe, and leaves room for vocals. For featured parts, use a stereo technique like XY with matched small-diaphragm condensers, such as Neumann KM184s, angled at 90–130 degrees. This setup delivers an immersive, accurate image and is highly mono-compatible. Avoid spaced pairs-they risk phase issues. When panning stereo tracks hard, always check mono compatibility to prevent cancellation. The XY coincidental pair keeps localization tight and translates well across systems, making it the pro choice when width and reliability matter.
Fix Phase Issues When Blending DI and Microphone
Even if you’ve captured clean DI and mic signals, phase misalignment can still rob your acoustic guitar tone of body and clarity when blended. Fixing phase issues is critical when blending DI and microphone tracks. Start by flipping the phase (polarity) invert on the DI channel-sometimes that’s all it takes. Then, zoom into your DAW and nudge the DI track for perfect transient alignment with the mic, ensuring phase coherence. Reference in mono to catch cancellations, especially between 100–250Hz where acoustic guitar loses punch.
| Method | Tool Example | Effectiveness |
|---|---|---|
| Flip phase | Polarity invert switch | Fast, first check |
| Manual delay | DAW editing | Precise alignment |
| Phase rotation | Little Labs IBP | Fine-tune phase |
| Mono check | Summed track | Reveal hidden issues |
Use a phase-rotation plugin like Voxengo PHA979 or Phasebug for surgical control. Tight timing prevents comb filtering and keeps your blend solid.
Polish the Sound With Subtle EQ and Reverb
With your DI and mic tracks aligned and sitting cleanly together, you’re now ready to shape the tone for a natural yet polished presence in the mix. Start with EQ: apply a high-pass filter around 80 Hz to remove sub-bass rumble while keeping the acoustic guitar’s warmth. Gently cut 200–400 Hz to reduce low-mid muddiness, then add a slight boost at 12–15 kHz for string clarity-just enough to shine, not harsh. For reverb, use a short, dark convolution like Universal Audio’s EMT 140 or EastWest’s Spaces with DPA 4099 wood-paneled room impulses; it matches the guitar’s character and keeps things realistic. Set decay to 1.2–1.8 seconds and add 20–40 ms pre-delay via a send-return loop to preserve transients. This reverb trick adds space without smearing the pick attack, letting your acoustic guitar sit polished, present, and natural in the mix.
On a final note
You’ll capture a natural acoustic tone by miking the 12th fret with a condenser mic, like the Audio-Technica AT2020, 6–8 inches away. Blend in a DI signal for flexibility, but check phase alignment to avoid thinness. Use subtle EQ to cut boxiness around 400 Hz, add reverb with under 2 seconds decay, and record in mono unless stereo enhances the arrangement.