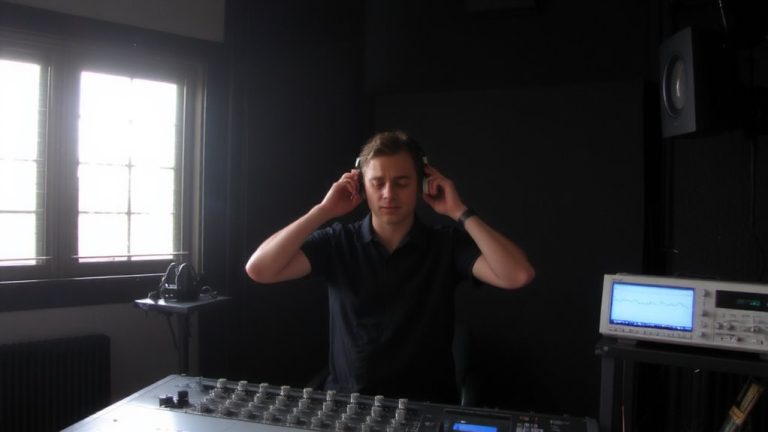
Establishing Reference Playlists of Well-Mixed Livestreams for Guidance
You’ll want to build your reference playlist from high-resolution livestreams like Boiler Room sets, NPR Live Sessions, or Grammy broadcasts, all mastered at -14 to -10 LUFS for accurate tonal balance. Pick WAV or FLAC files with punchy kicks, clear vocals, and stereo imaging above -6 on Insight 2’s correlation meter. Calibrate your system to 85 dB SPL, level-match to -17 LUFS, and use Ozone’s Tonal Balance Control 2 to match pro curves-there’s more where that came from.
We are supported by our audience. When you purchase through links on our site, we may earn an affiliate commission, at no extra cost for you. Learn more. Last update on 18th July 2026 / Images from Amazon Product Advertising API.
Notable Insights
- Source genre-specific livestreams from platforms like Boiler Room, NPR Live, and Mixcloud for professionally mixed audio examples.
- Prioritize high-resolution recordings mastered at -14 to -10 LUFS for accurate tonal and dynamic reference.
- Use calibrated monitoring at 85 dB SPL with room treatment to ensure consistent, distortion-free playback.
- Create a reference playlist of 3–5 WAV/FLAC streams in your genre for reliable A/B comparison.
- Match levels to -17 LUFS short-term and analyze frequency balance, stereo imaging, and dynamics using tools like Tonal Balance Control 2 and Insight 2.
Find Livestream Reference Playlists by Genre
Want to nail that punchy house mix or dial in the perfect metal balance? Start by finding genre-specific reference playlists from livestreams. Search YouTube or SoundCloud using combos like “live stream mix,” “professionally mixed,” plus your genre-house, metal, lo-fi hip hop. These give solid reference mixes with clear dynamics and tight stereo imaging. Check Boiler Room sets for electronic or NPR Live Sessions for folk and indie-both offer well-balanced, high-res audio ideal for comparison. On Mixcloud, DJ sets are tagged by genre and often mastered professionally, making them reliable for stereo imaging checks. Immerse yourself in r/AudioEngineering or Gearslutz for user-vetted streams, with feedback on clarity and spatial depth. Even Twitch broadcasts from Pensado’s Place or Adam Naylor reveal real-time EQ, compression, and panning choices. Use these streams to build a library of genre-specific reference material that guides your decisions with real-world accuracy.
Choose Well-Mixed Streams With Clear Balance
You’ve already started building a go-to collection of genre-specific reference playlists from livestreams, but now it’s time to narrow that selection to only the best-sounding sets-those with a clear, well-balanced mix. Choose streams like John Mayer’s 2023 Sob Rock tour or Coldplay’s 2022 Glastonbury set, where the frequency balance keeps kick drums punchy, snares crisp, and vocals present. These mixes offer tonal balance, avoiding muddiness or harshness, even during dynamic peaks. Prioritize high-resolution audio (24-bit/48kHz or higher) from Tidal or NativeDSD to preserve detail and prevent compression artifacts. Streams from Grammy Live or Tiny Desk Concerts often disclose professional gear and treated rooms, ensuring a clear balance. They’re typically mastered at -14 to -10 LUFS, aligning with industry standards for dynamic range and accurate reference use.
Set Up Consistent Monitoring for Fair Comparisons
While getting lost in the groove is easy, staying objective during mix checks means keeping your monitoring setup tight and consistent. Calibrate your system to 85 dB SPL using an SPL meter at your listening position so you guarantee your mix translates evenly. Adjust monitor gain to keep playback between 75–85 dB SPL, avoiding frequency distortion caused by room acoustics. Use Reference Tracks in high-quality WAV or AIFF formats-no lossy MP3s-to prevent artifacts from skewing critical assessments. Match levels precisely using LUFS metering so loudness doesn’t trick your ears during A/B comparisons. Always work in the same space, with fixed speaker placement and consistent room treatment, for repeatable results. When you Reference properly, you catch imbalances early. Set it once, stick to it, and let your decisions reflect reality, not room anomalies. This is how you guarantee your mix holds up in the real world.
Build Your Reference Playlist in Minutes
When you’re chasing a pro-level mix for your livestream, having a reliable reference playlist can make all the difference, and building one takes less time than a soundcheck. Start by Choosing the Right Reference: grab 3–5 high-quality livestreams in WAV or FLAC from your target genre, each hitting -14 to -10 LUFS for consistent tonal balance. Import them into Ozone’s Reference section so you can mix to a reference seamlessly, switching A/B without coloration. Focus on one track at a time to avoid confusion. Use Tonal Balance Control 2 to match your frequency curve to the pro reference, then level-match your output to around -17 LUFS short-term LU to eliminate loudness bias. Keep all references routed through the same monitoring chain for truthful comparisons. Done right, your reference playlist becomes your fastest path to broadcast-quality sound.
Compare Gain and Imaging Accurately
To guarantee your mix translates clearly across platforms, you gotta level-match your reference livestreams to -17 LUFS short-term loudness using reliable LUFS metering, because even small volume differences can fool your ears into thinking a mix sounds fuller or brighter than it really is. Make sure you switch between your mix and the reference at the same volume to judge perceived loudness accurately. Use Ozone 9’s Tonal Balance Control 2 to compare frequency balance in the bass (60–150 Hz), mids (500 Hz–2 kHz), and highs (8–12 kHz). Match similar sections-like chorus to chorus-for consistent gain staging. Check stereo imaging with Insight 2’s correlation meter, keeping values above -6 to dodge phase issues. Always reference high-bitrate or lossless livestreams so compressed audio doesn’t skew the stereo field.
Use Meters and Breaks to Improve Reference Comparisons
Since your ears can deceive you over time, especially after long mixing sessions, it’s essential to rely on both precise metering and regular breaks to maintain clarity when comparing your mix to reference livestreams. Match your mix and the reference at -17 LUFS short term using loudness meters to eliminate volume bias. Every hour, take a 10-minute silent break to reset auditory fatigue so you can try to focus better. After each break, perform immediate 5-second A/B comparisons to catch subtle imbalances in dynamics or frequency. Use Insight 2’s Loudness History Graph to track dynamic range and spot unnatural compression versus a professional sound. Apply Tonal Balance Control 2 to visually align your mix’s EQ curve with ideal targets across lows, mids, and highs. This combo of tools and discipline keeps your mix and the reference honest, transparent, and competitive.
On a final note
You’ve got the tools to build solid reference playlists fast, using well-mixed livestreams with +4 LUFS average and tight stereo imaging. Pick consistent monitoring like Beyerdynamic DT 770s, use iZotope RX for metering, and compare gain staging within 1–2 dB. Short breaks prevent ear fatigue, testers note clearer balance decisions. Stick to genre-specific streams, and you’ll mix with confidence, clarity, and real-world accuracy every time.